
The unassuming workhorse of the laundry room, your dryer, endures a beating cycle after cycle. It tumbles, heats, and tosses your clothes, all thanks to a hardworking team of components. Among these, the drum bearings for dryers play a crucial role in ensuring smooth rotation and preventing unwanted noise. But like any hardworking hero, even drum bearings can face their share of troubles.
Table of Contents
The lowdown on drum bearings in dryer
Nestled within the dryer’s core, the drum bearing acts as a silent guardian, allowing the drum to spin freely without wobbling or grinding. It’s typically a heavy-duty ball bearing that can withstand the constant friction and pressure generated during drying cycles.
Signs your drum bearing needs help:
- Earsplitting Screeching: The most common giveaway is a loud, high-pitched screeching noise emanating from the dryer, especially during the tumbling cycle. This sound is like nails on a chalkboard to your ears and a distress signal from your worn-out bearing.
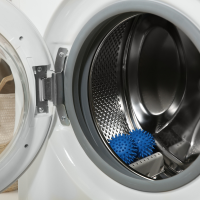
- Uneven Rotation: Observe the drum’s movement during the drying cycle. If it wobbles or tilts excessively, it could indicate a worn-out or damaged bearing struggling to support the drum’s weight.
- Vibration Overload: Does your dryer make the floor tremble like a mini-earthquake? Excessive vibration, often accompanied by screeching noise, points towards a bearing nearing its end.
Fixing the bearing blues:
- DIY diagnosis: Before diving into repairs, try to pinpoint the source of the noise. Disconnect the drive belt and spin the drum by hand. If you feel roughness or hear grinding, the bearing is likely the culprit.
- Bearing replacement: Replacing a drum bearings for dryer is no walk in the park, especially for DIY novices. It requires disassembling the dryer, which can be complex. Unless you’re handy with tools and comfortable tackling intricate repairs, consider enlisting the help of a qualified appliance repair technician.
Preventive TLC:(tender loving care)
- Regular cleaning: Lint buildup around the drum and the bearing housing can lead to premature wear and tear. Make sure to clean the washing machine filter to remove lint regularly, and vacuum around the dryer’s base to prevent lint accumulation.
- Weight matters: Don’t overload your dryer! Overstuffing the drum puts immense pressure on the bearing, reducing its lifespan. Stick to the recommended weight limit for optimal performance and bearing longevity.
- Listen to your dryer: Pay attention to any unusual noises or changes in vibration levels. Detecting bearing issues at an early stage can prevent the need for expensive repairs in the future.
- Lubrication lowdown: While some dryer models feature self-lubricating bearings, others require a helping hand. Check your owner’s manual to see if your dryer needs a periodic lubrication tune-up. If so, opt for a high-quality, heat-resistant lubricant specifically designed for dryer applications. Apply it sparingly to designated points on the shaft or bearing housing, following the manufacturer’s instructions to the letter. Overlubrication can attract more lint, so less is definitely more in this case.
- Warranty wise: If your dryer model is notorious for bearing troubles or you simply prefer peace of mind, consider investing in an extended warranty. This can save you a bundle in the long run, especially if bearing replacement becomes inevitable. Weigh the cost of the warranty against the potential repair expenses and your risk tolerance to make an informed decision.

Remember: A healthy drum bearing translates to a smooth-running, quiet dryer and a stress-free laundry experience. By understanding the warning signs and taking preventive measures, you can ensure your dryer’s hardworking hero, the drum bearing, enjoys a long and fulfilling life, keeping your clothes dry and your ears happy!
FAQs
Q1: How do I know if my dryer’s drum bearing is bad?
A: Listen for unusual noises like loud screeching, grinding, or clunking during the drying cycle. Observe the drum for excessive wobbling or tilting, and check for intense vibrations coming from the dryer. These are all red flags for a potentially faulty bearing.
Q2: Can I fix a bad drum bearing myself?
A: It depends on your DIY skills and comfort level. Replacing a drum bearing can be complex, requiring disassembly of the dryer and potentially specialized tools. If you’re not handy, consider calling a qualified appliance repair technician to avoid further damage.
Q3: How much does it cost to fix a drum bearing?
A: The cost can vary depending on the dryer model, labor rates in your area, and whether the bearing needs replacement or just lubrication. Expect to pay anywhere from $150 to $300 for parts and labor.
Q4: What are some other things that can cause similar noises and symptoms as a bad bearing?
A: Worn drive belt, faulty idler pulley, worn drum rollers, or damaged drum seals can all mimic some of the symptoms of a bad bearing. It’s important to have a qualified technician diagnose the issue to ensure a proper repair.