Ever noticed how your car’s shine fades over time? You’re not alone. Many car owners face the same issue.
Maybe you’ve been washing your car at home. But you’re unsure if you’re doing it right. Or you’re a beginner wanting to do it right the first time.
And the concern about protecting your car’s paintwork? That’s common too. You want the best products for this.
Well, worry no more. I’m here to guide you. This article will teach you how to wash your car properly at home. Let’s dive in!
Table of Contents
Step 1: Wash The Wheels
Before you start splashing water all over your car, pay attention to the wheels. They should be your first target.
Why, you may ask? Wheels are home to stubborn brake dust and various contaminants. And trust me, you don’t want these ending up on your car’s paint.
So, what tools do you need? Grab a wheel cleaner, a bucket of soapy water, and a wheel cleaning brush.
Kick-off by spraying the cleaner on all four wheels. Let the magic work for a minute or two.
Next, dip the cleaning brush in the soapy water. Time to agitate those wheels! Scrub every nook and cranny until you’re satisfied.
Now, it’s time to rinse. A pressure washer will do a fantastic job here. Blast off all the residue, and you’re done.
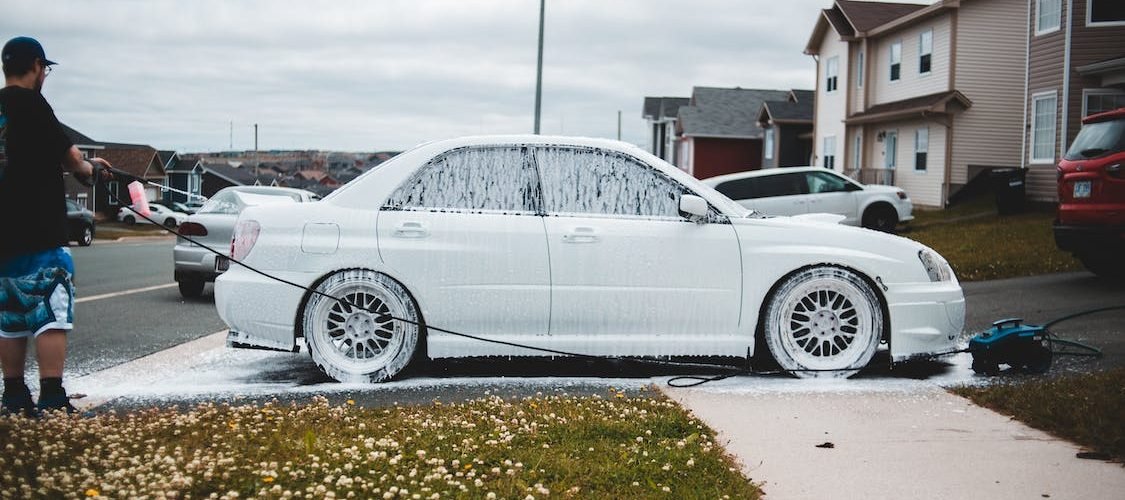
Step 2: Pre-Wash The Car
Surprisingly, pre-washing is a step often skipped by many. Yet, it’s critical to avoid scratching your car’s paint.
How to pre-wash, you ask? Use snow foam or a similar pre-wash product. Simply spray it all over the car.
The next part requires a bit of patience. Allow the product to sit for a few minutes. It’s worth it, as this will loosen up all the dirt, dust, and other pesky contaminants.
That way, most of contaminants will be removed prior to contact wash, which minimizes all the chances of scratching your car later in the process.
Step 3: Rinse The Car
Now, onto the fun part. It’s time to rinse your car. The pre-wash has done its job, breaking down those stubborn contaminants.
It’s crucial to be thorough in this step. Use a pressure washer to rinse off the entire vehicle. Get all those loosened dirt and grime off your car.
But wait, what if you don’t have a pressure washer? No problem at all. A garden hose with a gun attachment will work just fine. This handy tool increases the pressure a bit, making it a good alternative.
Ensure you cover all areas of your car. Once the rinse is complete, your vehicle is ready for a more detailed wash.
Step 4: Do a Contact Wash
Ready to make your car sparkle? Let’s do a contact wash. The tools you’ll need are simple: two buckets, car wash soap, and a microfiber wash mitt. If you have grit guards, they’ll be a bonus.
Now, fill one bucket with soapy water. The other bucket is just for clean water.
Start with dipping your wash mitt into the soapy water. Begin washing the car from top to bottom. Always remember, work from the top downwards.
When you finish cleaning a section, say the roof, rinse the mitt in the bucket with clean water. This will wash off any dirt and grime from the mitt. Then, re-soak it in the soapy water for the next section.
Once you’ve finished washing every part of your car, you’re ready to move on. Good job on getting your car clean. It’s time for the next step.

Step 5: Rinse The Car Thoroughly
Now that your car has been properly soaped and scrubbed, it’s rinse time again. And yes, you need to be as thorough as you were before.
Start from the top and work your way down. Make sure that not a single drop of car wash soap is left on your car.
Don’t forget about those nooks and crannies. It’s often where soapy water loves to hide. Give those spots a little extra attention.
Once you’re done rinsing, your car should be free of soap and any remaining dirt. That’s it, you’re done with the rinse. Now, onto the next step.
Step 6: Dry The Car
So, your car is sparkling clean. But it’s still dripping wet. The goal now is to dry it as fast as possible. Why? To avoid those annoying water spots.
You have several options to get this done. Microfiber drying towels, an air blower with a filter, or an air compressor.
I recommend using microfiber drying towels. They’re efficient, easy to use, and yield great results in a snap.
Just as before, start from the top and work your way down. The goal is to get the car as dry as possible. Not a single spot should remain wet.
And remember, we need a completely dry surface for the next step – applying paint protection. Ready? Let’s get to it.
Step 7: Apply Paint Protection
The final step in detailing your car’s exterior is applying paint protection and dressing the tires. Paint protectants will prevent your car’s paing from oxidizing and fading, and tire dressings will prevent UV and heat from damaging your tires.
For paint protection, you have many options to choose from. Personally, I swear by Nexgen Ceramic Spray. The application process is straightforward, and it lasts much longer than similar products on the market.
Here’s what you need to do: spray it on the painted parts of your car. Then, use a microfiber towel to spread it evenly. Buff it off with another clean microfiber cloth.
Once the paint protection is complete, let’s not forget about the tires.
Get a high-quality tire dressing product. This will condition your tires and make them look as good as new. The process is usually a simple spray and wipe, but always double-check the manufacturer’s instructions on the bottle.
And there you have it! Your car is not only clean, but it’s also well-protected and looks like it just left the showroom. Give yourself a pat on the back, you’ve done a great job.
Bottom Line
So there you have it. A simple, step-by-step guide to washing your car at home. With the right tools and a bit of effort, your car can look showroom fresh without even leaving your driveway. Happy washing!