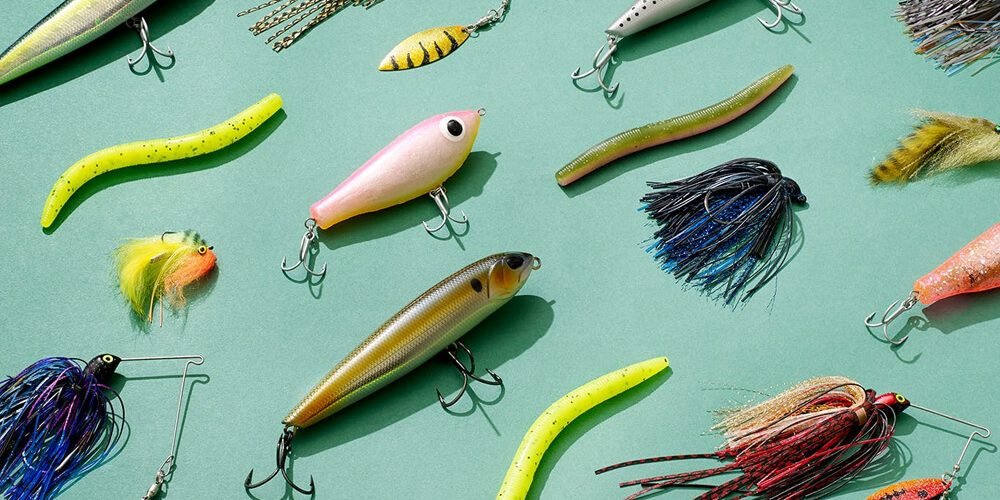
Ever thought of making your own fishing lure? Ever thought about how it is made and what all things, materials, and tools are required, what is the process of making it? Does it have any fun in making it or is it a boring time-pass?
If yes, then great we are here to help you make a fishing lure of your own. What all tools do you require and what is the methodology. If not, then expand your hobby by trying your hand at making some fishing lures. You’ll surely find it fun and interesting. This is a great idea to pass some time during long, cold winters.
What tools are needed to make lures?
Don’t panic, most of the specialty tools required are cheap, and most tools can be substituted with the tools people have.
Table of Contents
Tools List:
- Power drill
- Various drill bits
- Coping saw (for precision cutting)
- Roofing knife
- Knife for whittling (multitool)
- Tape measure
- Sharpies (fine and wide tips)
- Sandpaper (coarse and fine grit)
- Pliers or vice grips
- Small paintbrush
- Superglue of some kind (waterproof if possible)
Materials List:
- The wood of your choice ( people generally use a 1″x1″ piece of pine from a home improvement establishment)
- Large popsicle stick or shim of wood (from the craft store)
- Paint (generally used craft paint-its gonna be clear coated)
- Wood sealant (Use polyacrylic)
- Wood putty (for filling in holes/mistakes)
- Large nails
- Googly eyes (from the craft store)
- Small eyelets(use the smallest a person can find or it can be easily available from lure parts supplier online)
- Propellers (OPTIONAL)(from lure parts supplier online or make your own)
- Split rings (for attaching hooks)
- Treble Hooks
Step 1: Choose a Size
Firstly, a person should figure out how big they want their lure to be. Do they want Muskie action, or Pike, Or maybe some largemouth bass? Big lures results in getting big fish, most of the time. People generally go with average size, that is 3 inches.
If someone doesn’t have a lathe, they can do this the old-fashioned way that is by whittling. It can be made easier by cutting off the 4 corners of the rectangular block, lengthwise to thin out the lure.
A person can decide to go for a cigar-shaped topwater lure, so they can whittle the ends cone-shaped in order to do so. A lathe would be much faster, and a person could make dozens of blanks, of various shapes and sizes.
Step 2: Polish It Up
It is advised to use coarse sandpaper to smooth out the roughness of the whittling and finish with fine sandpaper to make a good painting surface. It also helps the lure to run straight and in the right direction in the water.
Step 3: Optional Step
It is advised to add small wings to the back of the lure to help the lure not spin wildly during the retrieve. There are no lures with this feature so people could make it a bit more creative and would make their creation even more unique. They can cut a small piece off the end of the popsicle stick and cut that piece in half.
A roofing knife can be used to carve out grooves that allow the pieces to fit snugly, then superglued them into place.
Step 4: Make It Life-like
People can drill some small pilot holes where the eyes would be placed then they can drill big holes so the craft eyes would fit snugly inside (try not to drill too deep). There is a small tab on the eyes, people can cut that off to make them fit in the round holes. After checking the fit, they can superglue them in. It will look like perfect bait.
An eyelet can also be placed in the nose for holding purposes. Now to come up with a paint scheme.
Step 5: What Do Fish Like to Eat?
Since we are advising to make a topwater lure, we figured a frog would be a good pattern. Grabbing the lure by the eyelet with vice grips, people could start with a base coat of white (optional, depending on the paint a person chooses).
The back of it should be a rich green color. A person can keep some goldenrod yellow under the mouth. Then people can add some spots to the back. It should not look too shabby. Let each individual’s creative juices flow in this, an individual may just discover the next hot bass-fishing color pattern. Or, the person can even copy some well-known lure patterns.
Step 6: Waterproofing
It is advised to tie some spare fishing line to the front eyelet, about 2 feet of it. The person should stir the polyacrylic well, and submerse the lure. Let the excess, drip off for a few minutes, and hang the lure to dry over some newspaper to catch drips.
Two to three coats will be more than enough, just make sure to let it dry completely between each coating.
Step 7: Now for the Pointy Bits
When the clear coat has dried for a day, it’s time to add some hardware. The person can add an eyelet to the back end, and one on the belly, near the middle, but closer to the front. The person should attach a split ring between a treble hook and the eyelet on the rear and on the belly.
The person is now ready to fish. This lure can be fished in walk-the-dog style, twitched, or burned in on a straight retrieve. The person can also add a propeller to the back after their first test for some added splashing effects.
Conclusion
We have provided you with all the information about the tools and materials required to make your own fishing lure and even the process too. It’s actually a fun activity making your own equipment. It could help a person in enhancing their fishing skills and also developing skills and can also be a good hobby. It can also be a good time pass for people in extreme winters when there are holidays and nothing to do. Go through the information provided and start developing and enhancing your skills, all the data is given just put some effort and utilize your time.


